If you’re applying to a school or university, the truth is simple: most people don’t fail because they’re “not good enough.” They get stuck because they wait too long to collect documents, ask for references, or rewrite their personal statement. Then suddenly the deadline is here and everything feels rushed.
This Application Timeline Planner: what to do 12 weeks before you submit is built for real life. It’s made for students juggling classes, work, or family responsibilities. In my experience, starting 12 weeks out gives you enough time to do things once—without panic edits the night before.
Below you’ll find a week-by-week plan, what to prepare first, and what students get wrong. I’ll also answer common questions like “How many weeks should I start?” and “When should I request letters of recommendation?”
What “12 weeks before submitting” actually means for admissions success
Starting 12 weeks before your deadline means you’re building a buffer, not just “trying to be organized.” In admissions, one missing piece can slow everything down. A late reference email, an incorrect transcript request, or a personal statement that doesn’t match the program can cost you time you can’t get back.
Admissions checklist in plain terms: you need accurate forms, proof of your study history, and strong application writing. Most schools and universities also ask for extra items like a CV, a short answer form, or test scores.
In 2026, many schools still expect you to submit online through a student portal, but the steps behind the scenes are still the same. You’ll request documents, track deadlines, and get signatures or uploads from other people.
If you want more tips about choosing programs, you may also like our guide on how to choose a study program that fits. It helps you decide what to emphasize in your application writing.
Application Timeline Planner: the 12-week plan that keeps you calm
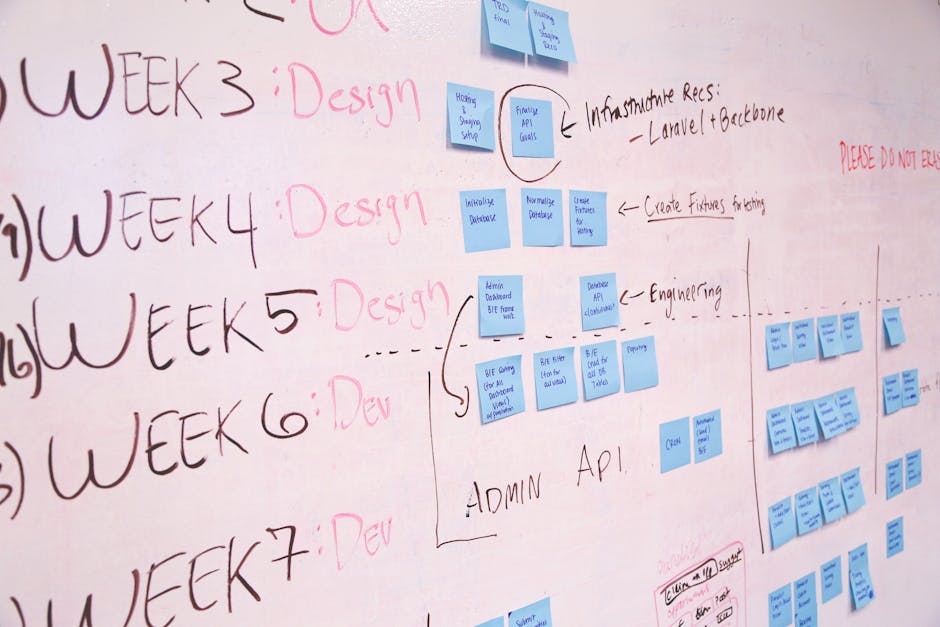
This section gives you a week-by-week plan. Use it like a roadmap. When you finish one step, you check it off and move on, even if the rest still feels far away.
Key idea: do the slow stuff first. Writing is important, but transcripts, reference letters, and account setup can take time.
Week 12 to 11: Confirm your exact deadline and admission requirements
Week 12 is for clarity. Find your real deadline (some schools have different dates for different intakes). Also look for “recommended” timing. Many universities process documents faster when they arrive early.
- Step 1: Find your program page and note the deadline for your intake (for example, Fall 2026).
- Step 2: Write down every required item: application form, transcripts, proof of language, personal statement, references, resume/CV, portfolio, or tests.
- Step 3: Check if there are separate deadlines for scholarships or special programs.
What most people get wrong here is assuming every school asks for the same things. Some programs want a “statement of purpose” with specific prompts. Others want short answers tied to selection criteria. If you miss one word in a prompt, you can waste hours later.
Week 10 to 9: Start document gathering (transcripts, IDs, and proof)
In this stage, you’re collecting documents and making sure they’re readable. If a PDF is blurry, admissions offices often ask you to resend it. That’s lost time.
- Transcripts: order official transcripts early. Ask your school how long it takes to send them and how they should be delivered (directly to the portal vs email vs mailed).
- ID and contact info: make sure your name matches on every document. If your passport has a middle name but your application form doesn’t, fix it now.
- English language proof (if needed): plan for the test booking and score reporting timeline. In many places, scores take weeks to show up.
Real-world scenario: I once saw a student lose two weeks because their school sent transcripts to an old email address listed in the portal. The fix was easy, but it still took time to correct and upload again.
Week 8 to 7: Build your school story (your first draft outline)
This week is about planning your personal statement or study motivation text. A strong application doesn’t just list your grades. It explains your path and how your program fits your goals.
Definition (simple): A personal statement is a written piece where you show who you are, what you’ve done, and why you’re applying.
- Make a timeline of your own learning: 3–6 moments that shaped your interest.
- Pick your 2 main themes: for example, “projects and curiosity” or “community impact and leadership.”
- Write 6 short bullet answers:
- Why this subject/program?
- What have you done so far?
- What do you want to learn next?
- How does this program match your goals?
- What challenges have you faced?
- What will you contribute?
Don’t start by writing a full paragraph. Start by choosing your moments. It’s faster and helps you avoid “generic” writing that could fit any applicant.
Week 6 to 5: Request references and draft your CV/resume
References are where timing matters. Teachers and counselors are busy, and late requests can mean a “no” or a rushed letter that doesn’t say what you need.
When should you request letters of recommendation? As a rule, request at least 4–6 weeks before you submit, so the writer has time to meet their own deadlines. Starting in week 6 puts you in a good position.
- Pick 2 people: often one teacher (subject-related) and one counselor or supervisor (work/volunteer).
- Send an email with details: your deadline, the submission method (email vs portal upload), and what you want them to highlight.
- Give them your “facts packet”: a short list of your projects, grades (optional), and 3 reasons why you’re applying.
If you want a template for organizing study-related documents, you might enjoy our study portfolio and document organization tips. Even if your program doesn’t ask for a portfolio, the same structure helps your application feel clear.
Week 4 to 3: Write the first full draft and match prompts exactly
Now it’s time to write. Create a first full draft. It won’t be perfect. That’s the point. You’ll edit with feedback after.
Prompt-matching check: copy the exact prompt text and highlight every part you must answer. If the prompt says “why this program and how it connects to your goals,” make sure both parts show up clearly in your draft.
CV/resume basics: Keep it simple and true. Most admissions teams look for recent work, study projects, and leadership activities. Don’t stretch dates. Don’t invent awards.
Here’s a useful trick: after you draft your personal statement, search your text for key words from the prompt. If they’re not there, you may not be answering the question fully.
Week 2 to 1: Final reviews, translations, and submission checks
Week 2 is review time. Week 1 is submission time. Don’t leave “small” tasks for the last day because small tasks cause the biggest mistakes.
- Formatting: follow the submission rules for file type (PDF vs JPG). Check that your file opens on your phone.
- Word count: if there’s a limit, remove extra lines now.
- Signatures: some forms need a counselor signature. Ask early.
- Language: run a spelling check and have someone else read it. A fresh reader catches awkward sentences fast.
At this stage, I recommend doing a “portal dry run” if possible. Log in, confirm you can upload files, and make sure your contact email works. A broken upload on the deadline day is a nightmare.
Month-by-month breakdown (plus how to adjust if your deadline is sooner)


If 12 weeks feels like “too long,” remember: not all parts will be hard for you. For some students, references and transcripts take the longest. For others, writing takes longer. Your job is to adjust the plan based on your bottleneck.
Quick guide:
| Application task | Typical time needed (most students) | Where it usually goes wrong |
|---|---|---|
| Account setup + uploading requirements | 2–4 days | Forgetting to check file size or format |
| Requesting transcripts | 2–6 weeks | Wrong delivery address or missing “official” request wording |
| Reference letters | 3–6 weeks | Asking too late or not sending a fact packet |
| Personal statement drafts + edits | 2–5 weeks | Not matching the prompt or being too general |
| Test scores / language proof | 4–12 weeks | Booking too late or misunderstanding reporting dates |
If your deadline is closer than 12 weeks, don’t panic. Start with the slowest tasks first: transcripts, references, and test/language proof. Then write your draft and ask for one round of feedback only.
Featured snippet: what to do first when you have 12 weeks left
Do this first: confirm your program’s exact requirements and deadlines, then start requesting transcripts and booking any needed test dates. After that, build your personal statement outline and request your references.
That order matters. If you start by writing, you may end up rewriting because you find out the program wants different answers. If you start by requesting transcripts too late, you’ll run out of time to fix upload issues.
People Also Ask: common questions about planning your application timeline
How many weeks should I start my university application?
For most school and university applications, start 12 weeks before you submit if you can. If you need language tests, official transcripts, or references, 12 weeks is a safer choice than 6 weeks.
If you’re applying to multiple programs, the workload is bigger. Add extra time for adapting your personal statement to each program’s prompts.
When should I request letters of recommendation?
Request letters at least 4–6 weeks before your submission date. If the writer has a heavy schedule, ask earlier. I usually recommend sending your request during week 6 of a 12-week timeline.
To get better letters, include:
- Your deadline and submission method
- What program you’re applying to
- 3–5 examples of work you did that shows your strengths
- A short reminder of your interaction timeline (for example, “I was in your class in 2025”)
Should I write my personal statement before I apply?
Yes—write it before you submit, but don’t force perfection in the first draft. Your personal statement is often the part you revise the most, and it’s easier to adjust your application when you’re not rushed.
A good plan is: outline first, then draft, then edit with feedback, then finalize in the last 7–10 days.
Do I need a CV/resume for every application?
Not every program asks for a CV, but many do. Even when it’s optional, a clear CV helps admissions teams quickly understand your study, work, volunteer, and leadership experience.
If the program doesn’t request it, double-check if they ask for details in the application form instead. Sometimes they want the information, just not the document.
What if my documents take longer than expected?
This happens more than students think. Schools can take time to issue transcripts, and some portals take time to accept uploads.
If something is delayed, communicate early. Many admissions offices prefer an email explaining the delay and your plan, rather than waiting and hoping everything arrives on time.
Also: keep copies of every email request and receipt. If you need to prove you ordered a transcript, that proof matters.
My best “avoid these mistakes” list (based on what students tell me)
Here are the most common errors I see when students are in the last 2–3 weeks. None of them are “hard.” They’re just easy to forget when you’re stressed.
Mistake 1: Submitting the wrong file version
I’ve watched students upload an older draft because they forgot they saved in two places. Always rename files clearly, like FamilyName_PersonalStatement_2026.pdf. Before you hit submit, open the file in the portal to confirm it displays correctly.
Mistake 2: References that are too vague
A strong letter includes specific examples. If you only tell your teacher “I’m applying to psychology,” the letter may be generic.
Send a short list of what you want them to mention. For example: a project you did, a presentation, a time you helped classmates, or a research task.
Mistake 3: Writing a “good essay” that doesn’t match the prompt
A prompt-match is different from “good writing.” If the prompt asks about “academic preparation,” and your essay only talks about personal feelings, admissions can’t see your readiness.
Make sure each paragraph connects to selection criteria the school cares about: skills, motivation, and fit.
Mistake 4: Leaving formatting for the end
Formatting changes late can break your layout. If the program expects a specific template or file format, check that early in week 3–4.
Tools and habits that make the 12-week plan easier
You don’t need fancy software. You need a system you will actually use.
Use a simple tracker (spreadsheet or notes app)
Track items by deadline, not by your memory. Create columns for:
- Requirement name
- Due date
- Status (not started / requested / submitted)
- Where it’s stored (portal / email / PDF folder)
- Owner (you / teacher / school office)
If you have multiple applications, add one sheet per university. This is faster than one mega list that you stop checking.
Set “check-in” reminders every 3–4 days
Admissions tasks are not one-time tasks. They create follow-ups. A reminder every 3–4 days keeps you from forgetting.
- Check transcript request status
- Confirm reference letter submission
- Review portal uploads
Do one feedback round only (and do it early)
Feedback late often creates more edits than you can finish. Instead, ask for feedback after your first full draft in week 4–3. Then do final edits yourself during week 2.
If you’re deciding who to ask, pick someone who understands your target program or who has helped with academic writing before.
Connect your plan to school and university study goals
Admissions doesn’t just “judge your past.” It tries to guess your fit and your future success. That’s why your timeline should connect to your study goals.
When you write your motivation text, answer one clear question: Why this program now, not later?
For example:
- If you’re applying to a business-related program, talk about a school project, business club role, or internship work.
- If you’re applying to engineering or science, focus on labs, experiments, problem-solving tasks, or math preparation.
- If you’re applying to teacher training or health programs, show how you understand people and responsibility.
This also helps when you fill out forms. You can reuse the same key examples instead of rewriting everything from scratch.
If you want guidance on how to talk about your experience in an organized way, our tips for writing a strong admissions essay can pair well with this timeline planner.
Quick checklist you can copy for your 12-week timeline
Here’s a printable-style checklist. Copy it into your notes app and check things off as you go.
Weeks 12–11 (clarity + deadline)
- [ ] Confirm intake deadline(s)
- [ ] List required documents
- [ ] Check file format and upload rules
Weeks 10–9 (documents + accounts)
- [ ] Request official transcripts
- [ ] Verify ID name matches application
- [ ] Gather language proof info (if needed)
- [ ] Create portal login and test basic upload
Weeks 8–7 (outline + plan writing)
- [ ] Outline personal statement themes
- [ ] Write bullet answers to prompt questions
- [ ] Draft CV/resume sections
Weeks 6–5 (references + first full draft)
- [ ] Request references with deadlines
- [ ] Send fact packet to each recommender
- [ ] Write first full draft
- [ ] Collect one feedback reader
Weeks 4–3 (edit + match prompts)
- [ ] Revise based on feedback
- [ ] Verify prompt answers in each paragraph
- [ ] Update CV/resume with newest items
Weeks 2–1 (final checks + submission)
- [ ] Final proofread (spelling + grammar)
- [ ] Confirm every upload opens correctly
- [ ] Double-check word limits and file naming
- [ ] Submit early if the portal allows
When this timeline doesn’t fit (and what to do instead)
Some students have special situations. If you just started school, changed programs, or had interruptions in your education, your timeline may need extra time for document requests.
If your transcript request takes 8–10 weeks, you may need to start before week 12. If your reference writers are only available during certain months, you may need to ask even earlier.
I’ll be direct: this plan still works as a framework. But you should reorder tasks based on what takes the longest in your situation.
Conclusion: your next step today (so you don’t lose time later)
Pick one action right now. Go to your program page and write down every requirement and deadline. Then create your 12-week tracker with owners (you, teacher, school office) and due dates.
If you do that today, the rest of the Application Timeline Planner: what to do 12 weeks before you submit becomes much easier. You’ll know what to work on each week, you’ll avoid last-minute surprises, and you’ll submit with confidence—not just hope.
About the Author